Now that we have a basic layout, it’s time to start drawing objects to the canvas. Pretty much everything we do from here on out will be done in JavaScript. We can add a script section to our page by adding a <script> block to the <head> section of our code. So far, we’ve gotten by without a <head> block, but nearly all HTML pages have one that comes before the <body> block. This block is used to define scripts, styles, and other settings that the browser loads before actually displaying the <body> block. We’ll start by adding a <title> block and <script> block to our header. The <title> block contains the text that will appear in the browser’s titlebar and the <script> block will contain all of our JavaScript functions. We’ll start with a single function just to make sure that the script is set up correctly. Change the code to look like this:
|
1 2 3 4 5 6 7 8 9 10 11 12 13 14 15 16 |
<!DOCTYPE html> <html> <head> <title>Tetris</title> <script> function initialize() { alert("JavaScript Initialized"); } </script> <body onload="initialize();" style="background-color:#EEEEEE"> <canvas id="myCanvas" height="400px" width="200px" style="background-color:#444444"></canvas> <div style="width:200px;background-color:#CCCCCC"> Score: 0 </div> </body> </html> |
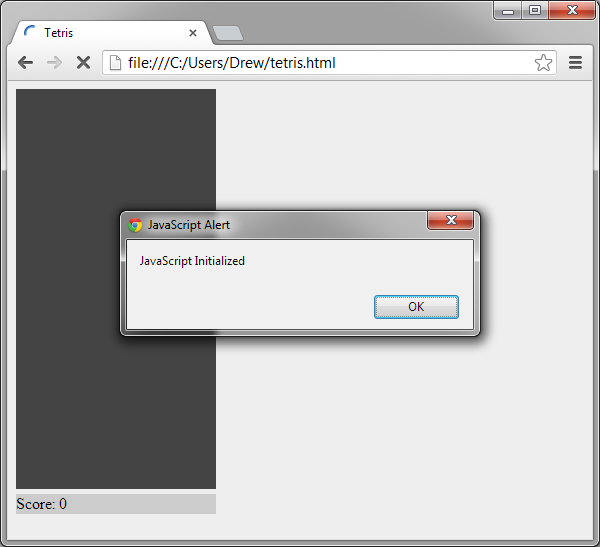
When you run this, you should see a popup window with the text “JavaScript Initialized”. The <script> block contains a JavaScript function called initialize that will set up our game. Functions are sections of code that can be run over and over again by calling the function. In this case, we call the initialize function by adding an onload attribute to the opening <body> tag. This tells the browser to call the initialize function as soon as the page is loaded. The pair of parentheses after the function name is where we would pass parameters to the function. Since we have nothing to pass to the initialize function, there is nothing inside the parentheses.
In the <script> block, we define the initialize function between a pair of brackets. Brackets are used in JavaScript to isolate sections of code with different scopes. Brackets can be nested like HTML blocks, and any code that appears within the initialize function brackets will be executed when we call the function. The only line currently in the function is another function call. The alert function is a built-in JavaScript function that takes a string of text as an input parameter and then displays a popup window with that text. Within functions, statements such as other function calls are terminated with a semicolon. This is an often overlooked syntax requirement and is the cause of many beginner errors. I recommend looking at a complete JavaScript tutorial such as the one here to fully understand everything that JavaScript is capable of.
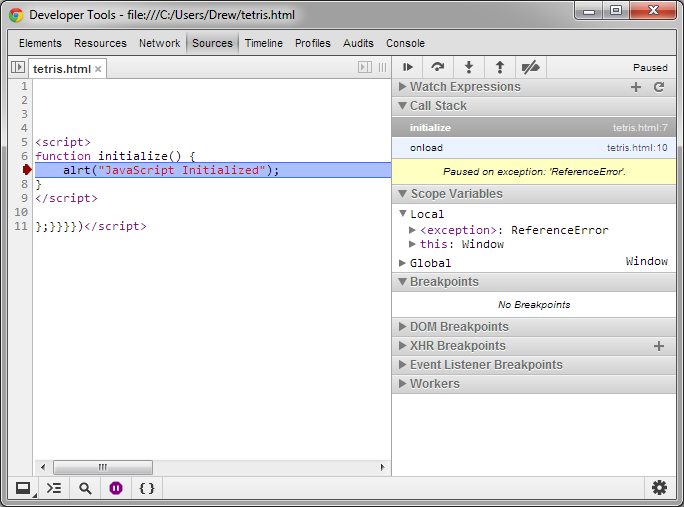
Before we go too much further, let me point out that Chrome and most other browsers offer a developer mode that can help locate errors in your code. In Chrome, it can be opened with Ctrl+Shift+J and it will highlight places where errors occur. I’m not going to go into very much detail about the developer console, but you should know that it’s there to help if something’s not working.
Ok, so now that we have JavaScript set up, let’s use it to draw a block to the canvas. First we need to create a JavaScript object that represents our canvas. This is done with the commands
|
1 2 |
c = document.getElementById("myCanvas"); ctx = c.getContext("2d"); |
These statements search our document for a block element with the id attribute equal to "myCanvas" and gets a 2d canvas object that we can use to issue drawing commands. The ctx object we create has several functions and properties that we can use to create graphics objects. The first command we’re going to use sets the current fill color for any subsequent commands. The second command creates a rectangle with a top-left corner at the coordinates (0,0) with a height and width of 20px.
|
1 2 |
ctx.fillStyle="#FF000"; ctx.fillRect(0,0,20,20); |
Our code should now look like this:
|
1 2 3 4 5 6 7 8 9 10 11 12 13 14 15 16 17 18 19 20 21 22 23 24 25 26 |
<!DOCTYPE html> <html> <head> <title>Tetris</title> <script> function initialize() { //Get the canvas context object from the body c = document.getElementById("myCanvas"); ctx = c.getContext("2d"); //Set the fill color for drawing commands ctx.fillStyle="#F00000"; //Create a filled rectangle ctx.fillRect(0,0,20,20); } </script> <body onload="initialize();" style="background-color:#EEEEEE"> <canvas id="myCanvas" height="400px" width="200px" style="background-color:#444444"></canvas> <div style="width:200px;background-color:#CCCCCC"> Score: 0 </div> </body> </html> |
I should mention that we can insert comments into our JavaScript code by starting a line with //. We can declare a block comment by starting a section with /* and ending it with */. I’ll use comments to explain what commands and functions do and to make the code more readable.
Although this code creates a red square in the top-left corner of our canvas, it’s not very flexible. In our game, we’ll want to draw blocks all over our canvas, so it would be nice to create a function that can draw a block at any place on the screen. The rules of Tetris force our blocks to lie on a grid, so rather than specifying a block position in pixel coordinates, I’m going to introduce game coordinates and define a function that can create a block at any grid position in our canvas.
The Tetris grid is 10 blocks wide and 20 blocks tall. Since we defined the size of our canvas to be 200 x 400 pixels, this implies that each block will be a square of 20 pixels. The canvas defines pixel coordinates with an origin in the upper-left corner with x-values increasing to the right and y-values increasing downward. It will make more sense in our game to define the origin in the bottom-left of our canvas and have y-values increasing upward. We’ll also define game coordinates in block units, so our canvas will only be 10 game units wide and 20 game units tall. Go ahead and modify the code with a drawBlock function.
|
1 2 3 4 5 6 7 8 9 10 11 12 13 14 15 16 17 18 19 20 21 22 23 24 25 26 27 28 29 30 31 32 33 34 35 36 37 38 39 40 41 42 43 44 45 46 |
<!DOCTYPE html> <html> <head> <title>Tetris</title> <script> var ctx; //Canvas object /************************************************ Initialize the drawing canvas ************************************************/ function initialize() { //Get the canvas context object from the body c = document.getElementById("myCanvas"); ctx = c.getContext("2d"); //Draw blocks in the four corners of the canvas drawBlock(0,0); drawBlock(9,0); drawBlock(0,19); drawBlock(9,19); } /************************************************ Draws a block at the specified game coordinate ************************************************/ function drawBlock(x, y) { //Convert game coordinaes to pixel coordinates pixelX = x*20; pixelY = (19-y)*20; //Set the fill color for drawing commands ctx.fillStyle="#FF0000"; //Create a filled rectangle ctx.fillRect(pixelX,pixelY,20,20); } </script> <body onload="initialize();" style="background-color:#EEEEEE"> <canvas id="myCanvas" height="400px" width="200px" style="background-color:#444444"></canvas> <div style="width:200px;background-color:#CCCCCC"> Score: 0 </div> </body> </html> |
The first thing you should notice is that we declared the ctx object outside of any function. This makes it a global variable and allows any function to use it without passing it as a parameter. Global variables should be used sparingly, and only for things that are required to maintain the game state.
The drawBlock function takes a coordinate in game coordinates and performs the necessary conversion to pixel coordinates. A red block is then drawn at the appropriate location in the canvas.
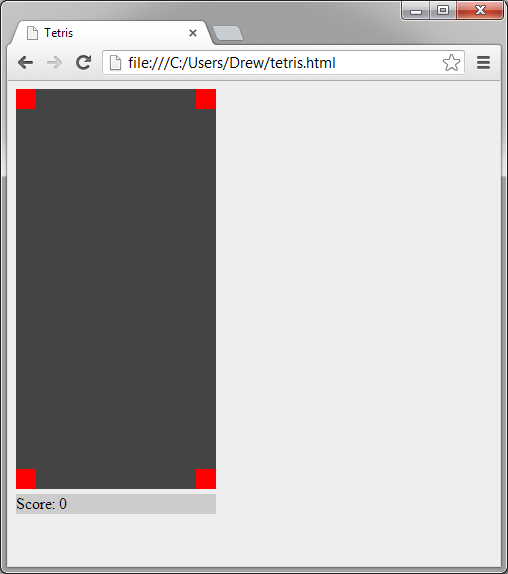
In the initialize function, after creating the canvas context, we call the drawBlock function four times to test the canvas boundaries. This should place a block in each of the four corners of the canvas. We’ll remove these later on, but it’s good to test our code like this to make sure that it works as expected.
What we have now is enough to really get started making our game. We’ll be creating lots of functions such as the drawBlock function to build up our game, little by little. The next step will be to create functions to draw all of the different Tetriminos.


